How to: Ultimate Guide to Set Up Space to Grow Cannabis
Successfully growing cannabis indoors is not an easy task. However, with the increased interest in cultivating the plant for personal uses the market now offers a lot of great indoor equipment to make this process easy and effective.
You have probably already heard about how Cannabis is a plant that doesn’t require too much effort as it can grow under not so perfect conditions. Well, this might be true, however, the right treatment and excellent conditions are required for a healthy and potent plant that you sure should aspire for.
All you need to know is what are the natural conditions that cannabis grows under in nature and how to best substitute them in your indoor growing space. We hope that this guide will ease the process and help in making it very successful.
Size Of The Space
Many successful grow rooms have started in a small space like a closet. In fact I recently reviewed the best small grow tents and there’s a few strong mini tents candidates.
As long as you have space to work around the plants, the exact size doesn’t matter. For most hobby or novice growers, anything bigger than a 2x2x4 space should be adequate.
You want enough space for not only your plants in the grow room, but also the equipment needed to create the right environment for proper growth.
Choosing Your Seeds
Selecting the right seeds is critical when determining the type of cannabis plants you want to grow. The color, height, quality, and aroma of the plant all depend on the quality of the seed. Try avoiding seeds that are damaged, soft, pale, or green. These seeds are not mature enough to begin the process of germination, which could result in weak plants, or worse, no plant at all.
Good seeds will be dark brown, shaped like a teardrop, and encased in a hard shell. Darker tiger stripes generally indicate indica seeds, while brown mottling seeds are typically sativa.
The most important factor when selecting seeds is choosing regular or feminized. Feminized seeds are typically more expensive, but most growers agree it is well worth the cost. Feminized seeds ensure the plant is going to be a female 99% of the time. This is important because female plants generally produce larger buds, and if a male plant is present, it will stunt the growth of the female plants.
Regular seeds have the capability of producing both male and female plants, but using regular seeds is risky because they could dramatically reduce the size of your harvest if they produce male plants. Therefore, beginners should strongly consider using feminized seeds.
How do You Germinate Your Seeds?
The easiest way to germinate your seeds is to plant them directly into a grow medium. Another common way to germinate seeds is using a seedling plug. Plant the whole plug after germination, and you’ll be on a proper growth trajectory. You should always use seedling plugs if you’re growing hydroponically.
When choosing the number of seeds, keep in mind that not every seed will flourish. It is common practice to assume 10 – 20% of the seeds won’t make it, so make sure to overestimate. The time it takes for seeds to germinate depends on many factors, but usually seeds will germinate in 2 to 7 days.
For beginning growers, it might be beneficial to practice the germination process on inexpensive seeds as you don’t want to take the risk of ruining a costly batch while you’re still learning to grow properly.
Setting up the Lights
When it comes to lights most growers are nowadays choosing full spectrum LED grow lights. Whit the constant advancements in the LED technology these lights have become:
• More efficient
• Economic- they consume less energy than any other
• Have a longer lifespan
• They come in many different shapes and sizes –suitable for any size of growing space
• They heat up less which means the temperature will be more controllable, also you can put them closer and increase the light intensity while avoiding the risk of burning the plants
• You can have LEDs with the right spectrum of colors to get the most out of your buds
Flooring
Your flooring material needs to be easily cleaned and sanitized, and it needs to be sturdy and resistant to humidity.
Bare concrete is a poor choice due to how porous it is and how it can soak up moisture and other chemicals. And then leach these things back into the air, creating a poor environment for your plants.
Covering your concrete floor with epoxy, paint, or other fluid coating can help solve it. Or you can lay down mylar or vinyl flooring, which will do the same thing as a good epoxy does.
Humidity
grow-room-humidity-control
Marijuana plants need the right climate for proper development, including moisture.
If the space where you build your grow room is too humid, the plants can develop different kind fungi on the leaves and buds.
Too low humidity will cause the plants to soak up more water at its roots, as well as excess salts.
Cannabis plants need the right level of humidity. Otherwise, your crop will not grow as big or yield as much product as it would otherwise.
There are things you can do about it, so if you think you’re grow space it’s too humid or too dry, check out Climate Control section down below.
Temperature
Not only do cannabis plants need the right humidity but they also need the right temperature.
If your grow room is in a closet or cupboard in your house, regulating your temperature shouldn’t be an issue.
If your grow room is in the basement or garage, and you live in a colder climate, then you night need to invest in grow tent heaters or cooling. You also need to be cautios if temperature usually fluctuates during the day.
Ventilation
grow-room-ventilation-discretion
Without proper airflow, CO2 is depleted, and humidity fluctuates too much, both of which can harm your plants.
Later you’re going to create a way for air to flow inside your grow room. Moving stale air out of the room with inline duct fans, to create a continuous airflow for your cannabis plants to thrive.
Unless your space is very well ventilated you’ll have to install an exhaust and, maybe intake fans too. If you are a beginner, you can try ECO Farm marijuana grow kit.
A best recommend.
ECO Farm 4*4FT(48*48*80inch)DIY Grow Package
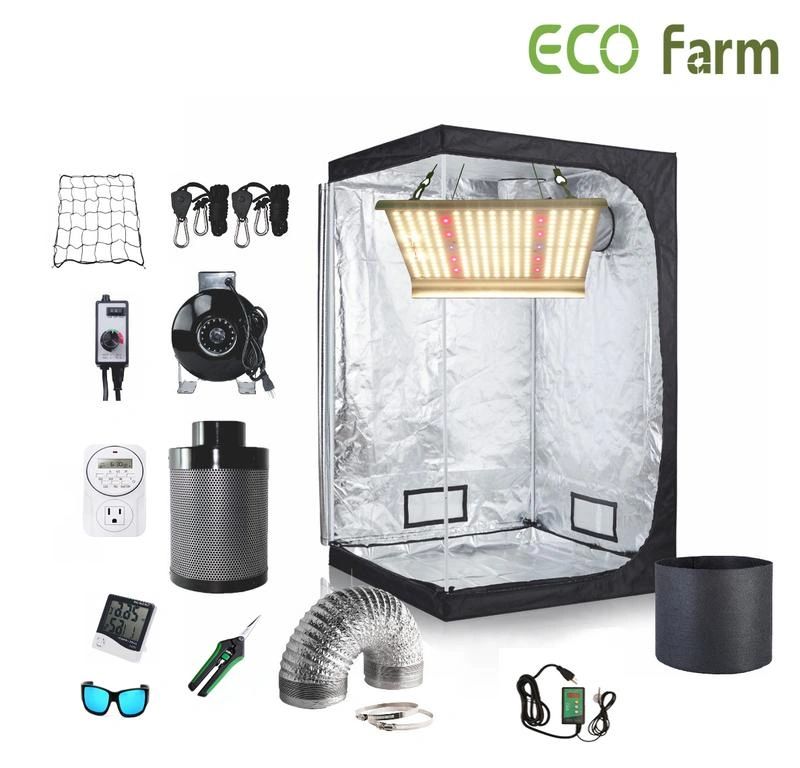
- KEEPS ALL LIGHT IN: The grow tent blocks all light from escaping and is lined with 98%-reflective mylar to boost the output efficiency of any grow tent setup.
- EXTRA-THICK CANVAS, STANDS STURDY: The top-quality 600D canvas is tear proof and double stitched for perfect light blocking; the thickness of the canvas is 0.8mm and the tent is supported by strong metal poles that are specially finished for smooth installation.
- ATTENTION TO DETAIL: Little is more annoying than a low-quality zipper, so we've gone to great lengths to ensure our heavy-duty metal zipper is the best on the market.
- FAST INSTALLATION: The grow tents are easy to install even if you've never done something like this before: no tools needed!
Discretion and Safety
Be sure to place your grow room in an area where no one can get to it without your knowledge. And make sure is not accessible to pets or animals. Especially when plants are young, if something messes with them enough it can bring plenty of growth problems.
Another thing to figure out is where is the smell going? Can a noisy neighbor be a problem it smells in your surroundings? There are things you can do about cannabis odors (as do the best grow cabinets for discreet home use), and it’s something to keep in mind.
Light leakage might be seen by neighbors as well. Grow room lights are on for long periods of time. And since HID can be extra bright, and LED give often purple light, it might catch unwanted attention.
Please be careful of hot lamps and other electrical devices not coming into contact with water or any material that could react to heat. And never coil up the reflector cables, they can heat up and be a real hazard.
Cannabis Harvest
A week or so before harvest you’re going to want to “flush” your media. This simply means that you stop feeding your plant nutrients and give only water. This allows your cannabis to use up all the available nutrients remaining in the soil so they won’t end up in your buds. Also, you can expect a degree of leaf yellowing during this final week as your plant converts its available resources into energy for continued bud development.
You can see our full article on when to harvest your buds here, but generally, you can determine when your buds are ready for harvest by examining the trichomes. You can use microscope to get a close up look at the trichomes. Clear trichomes generally mean it’s too early to harvest and your buds won’t be as potent. Milky white-amber trichomes means you are ready to harvest and can expect decent buds. If you wait longer, until the trichomes are completely amber in color, you’ll get a stronger psychoactive effect as CBD levels decline.
Harvesting generally requires scissors or gardening shears to remove your colas (bud sites) from your cannabis plants. Be gentle as to not disturb the potent trichomes.
Drying And Curing
Before we go into drying and curing, we should quickly revisit trimming. Trimming can be done before drying (wet trimming) or after drying (dry trimming). Either method is fine and will depend on your preference. The goal when trimming isn’t only to make your buds pretty by removing any fan leaves (which it definitely does) but also to collect the “sugar leaves” that surround your buds. Don’t get rid of these sugar leaves. They’re great for extracts, hash making, and in a pinch you can even smoke them, though smoking them will be a bit harsh.
With proper temperature and humidity control, you’ll be able to dry your cannabis in the same space you grew it. Most growers I’ve spoken with dry for a minimum of one week and often up to 10-14 days. There are a number of drying racks available that will allow you to spread out your buds for even drying. If you choose to dry trim, you’ll do this after drying but before curing.
Curing is a specialized drying process that comes after the initial drying and trimming. The goal is to cure the buds much like you would with homegrown herbs. You want a dark space with low humidity. You can cure in a glass jar, plastic tub, or a specially designed c-vault. You’re going to want to “burp” your container daily to remove any moisture remaining in your buds, and this is accomplished by simply opening the container and closing it again. The curing process can last anywhere from a few days to a couple weeks.
Final Thoughts
You don’t need to be an expert DIYer to build a grow room, nor do you need to be a seasoned gardener to develop a healthy and productive cannabis crop.
If your grow space doesn’t allow for a custom build, you can always check my marijuana grow tent reviews as it’ll make things much easier for you.
But in the end all you need is creativity and careful planning sense to build grow room for your cannabis needs.
Replies