Curing Cannabis Plants - How to Dry Weed The Best Way!
New growers often think the hard work is over when they cultivate and harvest their precious marijuana plants. Not quite! Unfortunately, you need to wait a little longer to enjoy the fruits of your labor. You have to trim, dry, and cure your harvest before it is ready for use.
The trimming and drying aspects of cannabis preparation are essential. However, not everyone proceeds with the curing process, primarily because it isn’t 100% crucial. Also, it means waiting even longer to sample the crop. Expert growers recommend going through the full curing cycle, though. The process increases potency and boosts the flavor and quality of your smoke. It also enables you to store your weed for longer.
It is up to you to decide whether to cure your marijuana or not. However, there is no question that you have to dry it properly in the first place. That topic is the basis of this guide: How to dry marijuana flower with a marijuana dryer … the right way!
Why Do Growers Dry & Cure Buds After Harvest?
Here’s what drying and curing cannabis properly does for you…
- Breaks down chlorophyll and dramatically improves taste / smoothness of buds
- Gets rid of the unpleasant “fresh hay” or “cut grass” smell which is common on newly harvested buds
- Brings out the subtle flavors and unique smell of your cannabis strain
- Reduces “harshness” in buds; you’re less likely to start coughing or get a headache
- Buds are less likely to cause anxiety, racing thoughts, or paranoia
- Reduces the chance of mold or bacteria growing on your buds
- Curing seems to actually increase potency!
WHAT’S THE DIFFERENCE BETWEEN DRYING AND CURING?
Drying, as the name suggests, involves drying fresh buds so they contain less moisture and can be smoked or vaporized properly. Curing, on the other hand, involves storing your buds in closed containers over a period of at least two weeks. This helps develop the flavour and aroma of your buds as they mature.
A Few Things to Consider When Drying Weed
There are several sophisticated methods to dry marijuana flowers, including freeze-drying. As it happens, the simplest way to do it is arguably the most effective. The drying (and curing) process begins the second you cut down the cannabis plant. First and foremost, it is imperative that you are patient during the drying process because you must dry it slowly.
However, you must ensure it doesn’t happen too slowly, or else you risk mold growth. Impatient individuals make the mistake of using ovens, microwaves, and hot air fans in a bid to speed things up. You are welcome to try any of these tactics, but don’t blame us when your pot is ruined.
Experienced growers know that drying should take place in a dark environment since exposure to sunlight reduces the cannabinoid content of weed.
Darkness also reduces the level of chlorophyll in the plants. This is good news because too much of it results in a harsher smoke. However, no matter what process you use to dry buds, you have to trim the plant first. It is a tedious process that feels as if it is taking forever. Nonetheless, you must complete the process to end up with a more aesthetically pleasing bud.
You can skip trimming and risk keeping leaves on the plant. You’ll regret it when the weed burns your throat and lungs! Also, the sugar leaves on the bud have a lower THC concentration. Therefore, if you don’t trim the plants, you are cheating yourself out of a damn good high.
Best RECOMMENDS for you
ECO Farm Electric Medicinal Plants Dryer
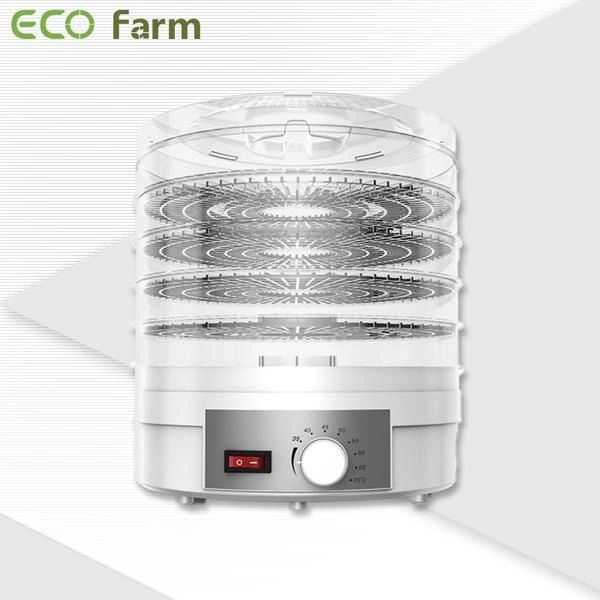
Save Time, Money, and Space
How long does it take to dry medicinal plants? Typically it can take a week or more until it’s fully dried. Not to mention, drying medicinal plants takes up a lot of valuable space. Space that could be used to expand your grow.
Why not save time, space, and ultimately money when you’re drying your medicinal plants? ECO Farm takes up a little over one square foot and can dry at least 6 ounces in that small space.
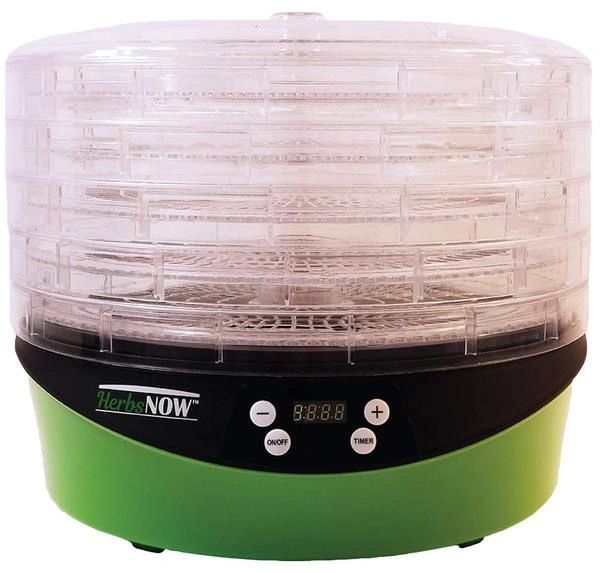
The HerbsNOW dryer gives you the perfect environment to dry your medicinal plants every time. Using advanced technology, HerbsNOW provides you with a pre-set, ideal temperature that has been tested exclusively for drying medicinal plants.
Multi-directional airflow, along with open-weave trays ensures each bud is dried consistently. This also means you do not need to rotate or touch the buds during the drying process.
HerbsNOW provides all of this in a captured environment, meaning you get high-quality, consistent drying in a small, enclosed space. Take back all of the space you’ve needed for hang drying because HerbsNOW only needs one square foot to give you consistent drying every time.
How to Dry and Cure Your Cannabis
Learning how to dry and cure cannabis buds is an art form. If you live in a coastal region, it is hard to dry cannabis quickly. This is because of the high nighttime humidity in such areas. Marijuana in these locations is at high risk of mold attack. So, the best time to try and dry weed quickly is in winter or fall.
If you live in a warmer climate or an area at high elevation, e.g., Denver, it’s a different situation. In Arizona and Nevada, the temperature can range from 28-115 degrees Fahrenheit during the year, with mainly low humidity levels. Denver is located at 5,000+ feet elevation with a temperature range of 0 degrees Fahrenheit (and lower) to over 100 degrees in summer. For residents of such areas, particular attention has to be paid to the drying and curing process.
Ideally, a cannabis bud will react similarly to a marshmallow when squeezed between your fingers. If it is excessively dry, it will fall apart and become a dry powder. While it is relatively easy to dry and cure small amounts, there is a greater challenge associated with commercial quantities. Don’t assume that there is a particular temperature, elevation, or humidity level you need to aspire to.
Even so, your drying room must be well ventilated with lots of filtered, fresh air coming in from outside. You will also need to take measures to ensure correct odor control for exhausted air.
Dry at temperatures between 60 and 70 degrees Fahrenheit to preserve terpenes. Combined with poor airflow, an excessively low temperature results in cannabis with a high chlorophyll level.
Growers like to water cure, freeze-dry, or dry ice cure their plants. However, in this guide, I will focus on a tried and trusted drying and curing method.
First Step – Cannabis Drying
Before you begin the drying and curing process, make sure you have all of the equipment that you will need. You will need wide-mouth mason jars for all your plants, a drying rack, a hygrometer, and humidipacks. The last two are optional. However, they make things easier by measuring humidity and ensuring your weed doesn’t get too dried out.
You begin the drying process as soon as you harvest your cannabis. When growers cut down the weed, they immediately notice how sticky and wet the flowers are. This is an excellent indication of your plants’ psychoactive resin levels. However, if you leave things as they are, you invite bacteria and fungi. Let’s go through the cannabis drying steps.
Step 1 – Cut Down the Plant
It is possible to harvest your plant piece-by-piece. So, cutting down your plant is a process that is hard to mess up. You can cut off the branches and leave them to dry or hang the entire marijuana plant upside down.
Some growers prefer to cut off individual buds and lay them out on a drying rack. Most people cut off the branches, making sure that they are 12-16 inches long.
Step 2 – Trimming
There is ‘wet trimming’ and ‘dry trimming.’ The former involves trimming the plants as soon as they are ripe. Cut off branches individually and use shears to trim down unnecessary plant matter off each one. Don’t get rid of all the sugar leaves, because their lower cannabinoid content makes them ideal for edibles.
Dry trimming is best used when harvesting on a commercial scale. This is where you cut off branches and hang them upside down from individual lines. Make sure you only trim and process them when thoroughly dry.
It is a trickier process than wet trimming because the sugar leaves are curled towards the bud.
No matter which method you use, make sure you get rid of the larger fan leaves to improve the appearance of the buds.
Also, your weed will become a lot harsher to smoke if you allow too much leafy matter to survive. As a rule of thumb, you need to trim fewer leaves if you live in a region where humidity levels are below 30% on average.
Step 3 – Slow Drying
Overall, the ‘ideal’ drying environment is a temperature between 65 and 75 degrees Fahrenheit with 50% humidity. You can reduce humidity with a heater, dehumidifier, or air conditioner. Alternatively, you can increase humidity with a humidifier or an evaporative cooler.
We urge you not to attempt fast drying in a microwave, stove, or via dry ice! Weed dried like this tastes awful, and it could cause side effects such as paranoia or headaches.
Do not dry your weed in temperatures above 80 degrees, or else you will lose most of the terpene content. Experts suggest that proper drying comprises approximately 50% of final bud quality. There are several ways to dry your weed. Most people use a drying rack, or else they hang the plant upside down.
Hanging them upside down is a great way to save money. You can hang your weed from a string, a clothesline, or hangers. Although a drying rack increases overall expenditure, it is worth it because it dries the bud faster.
With a drying rack, the stems must be removed from the bud. It is a good idea to use a rack if you live in an area of high humidity. Alternatively, you can carefully lay out your bud on a flat surface such as cardboard. Just make sure you rotate your weed every few hours to prevent the formation of wet spots. If you’re finding it hard to dry the buds properly, invest in a small fan to boost airflow. It is important not to point it directly at the weed, though. Above all, dry your weed in an area that is easy to access so you can check on it regularly.
Step 4 – Patience!
All you can do now is wait. Check your bud regularly and allow it to dry until the outsides feel dry to the touch. Another sign is when the small stems snap rather than bend. It usually takes 3 – 7 days for buds to dry fully.
If you achieve proper dryness before then, you have completed the process too quickly. This is okay, but it will increase the time taken to ‘cure’ the cannabis. Also, if the buds are too dry, the curing process could completely grind to a halt.
Your 6-Step Guide to Cannabis Curing
Once you’re satisfied that your cannabis buds are dry enough, it is time to complete the curing process.
Step 1 – Separate Buds from Branches
Ideally, you will have completed this step already. If you haven’t, trim the buds and separate them from the branches.
Step 2 – Place Buds into a Container
You have put so much effort into the process that it would be a shame to get it wrong now. From now on, your primary goal is to ensure that your cannabis buds are stored in a controlled environment.
Ideally, you will store the buds at a humidity of 60-65% and a temperature of around 70 degrees Fahrenheit. At this moisture level, the buds will feel dry on the outside but still have a softness to them.
Wide-mouth mason jars are by far the best storage containers for marijuana. You can find them online or even at Walmart! Purchase 32 oz jars as they can hold up to 1.25 oz of dried bud. You could invest in larger jars, but with this, you increase the risk of mold growth. Make sure you only fill the jar so that it is 75% full. You want to leave a little air at the top and to avoid crushing the buds.
You need to be able to shake the jar now and then. If the buds are sticking together when you do this, it means your weed isn’t dry enough for curing.
Other storage options include wooden, metal, or plastic vessels. You can use plastic bags in a pinch, but they degrade after making contact with specific terpenes found in weed. Interestingly, some growers deliberately cure bud when it is a little wet on the outside to cause additional bacterial growth.
Generally, it’s best to avoid this tactic as it usually produces inferior quality marijuana that is harsher on the lungs.
Step 3 – Place Container in a Dark Place
Make sure the mason jars are sealed and place them in a cool, dark, and dry spot. Hopefully, the exterior of your buds is not crunchy and dry. This would indicate that the moisture from the interior of the flower has rehydrated the outside. If the outside is too dry, it means your marijuana is too dry.
Step 4 – Regular Checks
During the first few days, make sure you open the jars several times a day to let the flowers breathe. This is a crucial step because you allow moisture to escape while providing more oxygen.
If you open the container and there’s a foul odor of ammonia, it is a sign of anaerobic bacterial growth. This happens when you try to store buds that haven’t dried thoroughly. If you do nothing, you will end up with moldy weed.
If you have a hygrometer, use it regularly to test the humidity of the container. The ideal humidity range is between 60-65%. Here’s what to do if the humidity level is outside this range:
- Over 70%: Place your buds outside the jar for 12-24 hours.
- 65-70%: Take off the lid of the jar for 2-4 hours, but keep the bud inside.
- 55% or less: Rehydrate with a humidipack if you have one.
Leave your jars open for a few minutes with every check. After seven days, you only need to check your jars once every two days. If you believe your buds are too dry, leave them inside the jar for up to three more days. This will allow you to see if any moisture from the interior of the bud comes to the surface.
If you don’t have a humidipack, you can use organic matter, e.g., an orange peel to rehydrate the bud. However, by doing so, you also increase the risk of mold growth.
Step 5 – Repeat All Steps For 2-3 Weeks
Your cannabis should be primed and ready for use after approximately three weeks in a mason jar. However, some experts believe that eight weeks of cure time is optimal. There are a few marijuana strains that benefit from a six-month curing process — if you can wait that long!
In most instances, curing does little for strain quality after six months. At this stage, it is best to create a long-term storage solution to ensure your weed remains potent.
Alternatively, you can vacuum seal the cannabis or store it in tightly-packed mason jars. Don’t try long-term storage unless the marijuana buds have been curing for at least three months.
Step 6 – Pack in Portions and Weigh
If you intend to keep the weed for personal use, then it’s a good idea to invest in humidity packs. They will keep your marijuana fresh for a super long time.
There are a host of low-cost cannabis scales available online. Choose a brand, weigh your weed, calculate your usage, and determine how long this batch is going to last you!
Final thoughts
Properly harvesting, drying, and curing cannabis is a dedicated practice that takes trial and error for home growers and professional cultivators alike. But the extra care is worth the time it takes to master these steps and preserve the integrity of your flower.
Replies